6.5 Using GenMaster
SIU references: SIU-283, SIU-284, SIU-285, SIU-286.
The GenMaster application allows you to do the following:
- Set up the key protection mechanism for the MyID installation.
-
Set up a startup user with a password.
The startup user allows you to access MyID for the first time and complete the setup of your system.
- Set up shared secret keys.
Your choice of key protection mechanism is a compromise between cost, convenience and security.
-
Registry secured
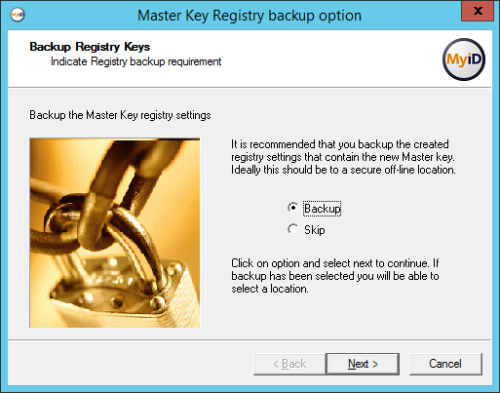
The most convenient but least secure method is to use registry keys, where the database encryption keys are held in the registry. Although access to the keys can be controlled by applying access rights on the relevant branch of the registry, it is still only recommended for test, demonstration or low security installations. It does have the benefits of fast installation, no additional hardware and unattended restart.
-
HSM secured
The most secure option is to use an HSM. In this case, not only is the database key secured, but the HSM also performs on-board decryption, further decreasing the risk of the key being exposed. The choice of HSM and its configuration can affect the ability to perform unattended restarts, as some devices can require a smart card to authorize when rebooting.
For production environments we recommend the use of an HSM, unless you consider that the physical security of the application server meets your acceptable level of risk.
For full information on your chosen HSM support, see your HSM integration guide.
6.5.1 Running GenMaster
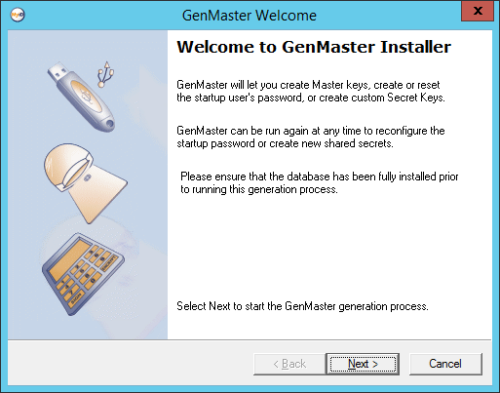
The GenMaster program is started automatically by the installation process. You can also start the program from the Start menu.
-
Run GenMaster.
-
If prompted, enter an admin user name and password.
The Welcome screen appears.
- Click Next.
-
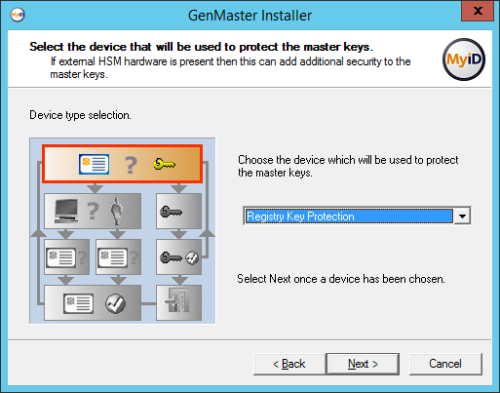
Select the method of securing the master keys.
Note: The master key is an AES256 key.
Select one of the following options:
- Registry Key Protection – the key is stored in the registry of the MyID application server.
- nCipher HSM key protection – the key is generated and stored in the nCipher nShield HSM.
- LUNA SA HSM key protection – the key is generated and stored in the Thales Luna HSM.
Note: nCipher nShield and SafeNet Network (LUNA) HSMs are currently supported. Make sure you have set up your HSM according to the instructions in the relevant integration guide before installing MyID:
If an HSM is not installed, a corresponding entry will not be displayed in the drop-down list.
If an HSM is installed and the corresponding entry is not in the drop-down list, then review the instructions in the relevant integration guide and ensure all steps have been followed.
In particular, for the nCipher HSM, check that the CknFast.DLL has been copied into the Windows\System32 directory.
-
Set up the key protection.
 To use the nCipher HSM key protection option:
- Select nCipher HSM key protection from the drop-down list.
-
Click Next.
-
If a card-set is to be used to protect the key ensure that it is in the HSM card reader. If the card does not appear in the combo box, click Detect Card after the card is inserted.
- If the card-set is PIN protected, enter the PIN.
- If the key is to be Module protected, select ‘Module’ in the combo-box.
-
If you have previously generated a master key in Keysafe (for instance if you are operating in FIPS140-1 level 3 mode):
- Enter the name of the key in the Key Name box.
- Ensure that the Generate New Master Key box is cleared.
If you have not previously generated a master key and you are not operating in FIPS140-1 level 3 mode:
- Enter a new name in the Key Name box.
- Ensure the Generate New Master Key box is selected.
Note: There must not already be a key of this name installed on the HSM.
-
Click Next to generate the keys – this may take a few seconds.
For more information, see the nCipher nShield HSM Integration Guide.
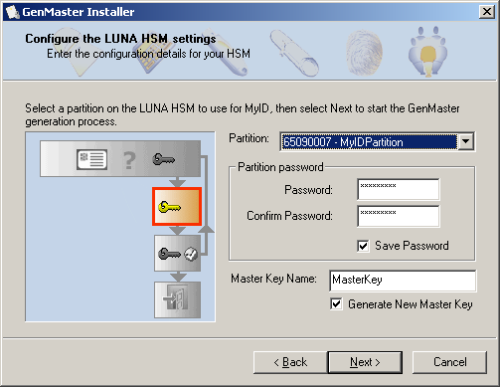
 To use the LUNA SA HSM key protection option:
- Select LUNA SA HSM key protection from the drop-down list.
-
Click Next.
- Select the partition you want to use for MyID from the drop down list.
- Enter and confirm the password for the partition.
-
If you have previously generated a master key in Keysafe (for instance if you are operating in FIPS140-1 level 3 mode):
- Enter the name of the key in the Master Key Name box.
- Ensure that the Generate New Master Key box is cleared.
If you have not previously generated a master key and you are not operating in FIPS140-1 level 3 mode:
- Enter a new name in the Master Key Name box.
- Ensure the Generate New Master Key box is selected.
Note: There must not already be a key of this name installed on the HSM.
-
Luna SA HSMs require a password to connect to the partition; this is the HSM Partition Administrator password, not the crypto user.
- If you do not select the Save Password checkbox, you will have to enter the password in the Card Manager Startup dialog box after any machine reboot before the MyID keyserver will start.
- If you choose to save the password the MyID keyserver will start automatically.
Note: This password protection is in addition to the HSM client certificate access control, so even if a user obtains the password they cannot use the HSM remotely unless their client has a certificate and has been authorized.
Important: If you choose to save the password, the password is saved in the registry on the MyID application server for the MyID COM+ user:
HKEY_CURRENT_USER\Software\Intercede\Edefice\MasterCard
The password is saved encrypted to the registry; see section 6.6, Setting the HSM PIN.
-
Click Next to generate the keys – this may take a few seconds.
For more information, see the Thales Luna HSM Integration Guide.
-
You can now select one of the following options:
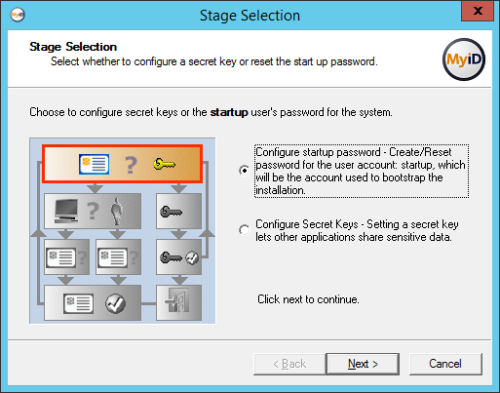
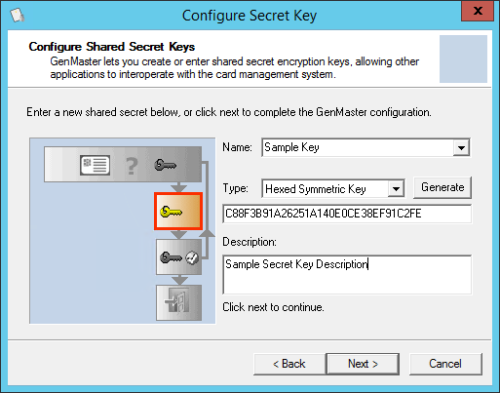
- Configure Secret Keys – this option allows you to set up secret keys that allow other applications to share sensitive data.
-
Configure startup password – this option allows you to set the password for the startup user account.
Note: You must set up a password for this account when you first install MyID or you will be unable to access the system. If you are upgrading an existing MyID system and already have a smart card or password user that you can use to access the system, you do not have to configure a startup password.
-
To configure secret keys:
-
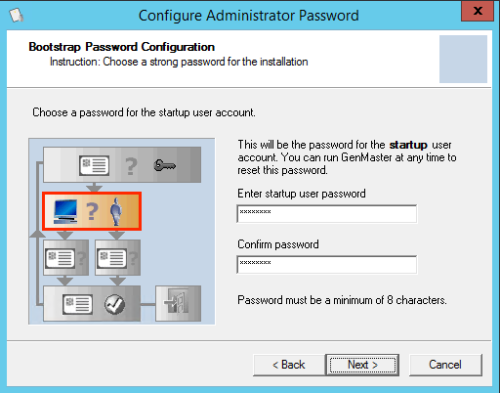
To set the startup user password:
Note: If you have upgraded from an earlier version of MyID, or have removed the startup account as part of locking down the installation, the startup user does not exist, and you will be unable to configure the startup password. If you need to recover this startup user account, you can use the Recover Startup User utility; see the Recover Startup User section in the Implementation Guide.
- Select Configure startup password.
-
Click Next.
- Type the password, and type it again to confirm it.
-
Click Next.
Note: If you enter the startup user password incorrectly three times, the startup user account becomes locked. To unlock the startup user account, run GenMaster again, and create a new password for the startup user.
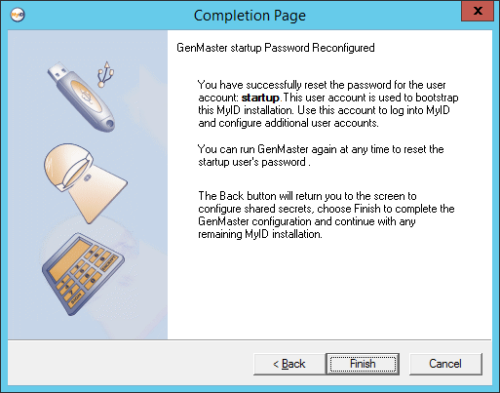
- Click Finish.
If you are running GenMaster as part of the initial installation, GenMaster returns control to the main MyID installation program, which completes its setup.
